6 Steps to Redo Bathroom Cabinets for a Brand New Look (& for Cheap)
You can redo bathroom cabinets for cheap by cleaning, sanding, priming, and painting your existing vanity, no full replacement needed.
Painting, prepping, and swapping out hardware are three of the most cost-effective ways to refresh a bathroom.
Las Vegas homeowners do it every season, and at Majestic Cabinets, we see it firsthand.
As a licensed and insured cabinet builder, we work with homeowners, some ready for a full custom vanity build, others who just need guidance on whether their existing cabinets are worth saving.
If your cabinet boxes are still solid, no warping, no water damage at the base, you likely do not need to replace them.
The dry desert climate in Las Vegas works in your favor. Low humidity means paint dries faster and adhesion holds better than in more humid parts of the country.
Start Here: Decide If Your Cabinets Are Worth Redoing
Before you buy a single can of primer, take a hard look at your vanity.
Press along the bottom of the cabinet and the toe kick. If the wood feels soft, spongy, or smells musty, that is water damage, and no amount of paint will fix it.
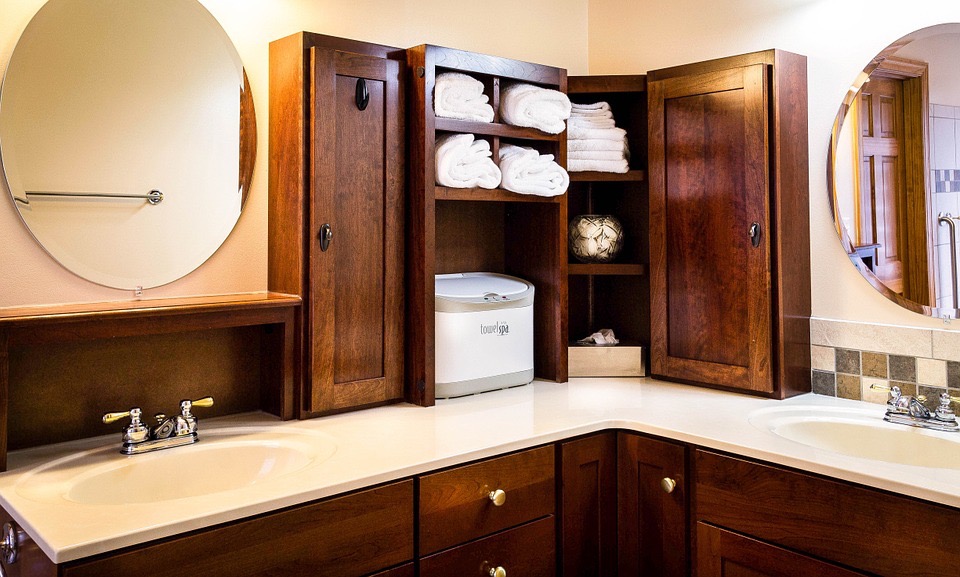
But if the structure is solid and the issues are purely cosmetic, you are a good candidate for a DIY refinish. A proper paint job on a well-built vanity can last eight to ten years, according to Ohio Painting.
The keyword is “proper”. Prep work is where most DIYers cut corners, and that is exactly where things fall apart.
Your cabinets are worth redoing if:
- Cabinet boxes feel firm with no soft spots or warping
- Damage is cosmetic, peeling finish, dated color, and scratched doors
- The layout already works for your space
Consider a replacement if:
- The wood feels spongy or smells musty at the base
- There is visible water staining inside the cabinet
- The hinge points are cracked, or the doors no longer hang straight
Also, check what surface you are working with before you start. Solid wood and MDF paint beautifully with a standard bonding primer.
Thermofoil and melamine need a shellac-based primer to get the paint to bond properly.
We will cover both.
What Supplies Do You Need to Redo Bathroom Cabinets?
Beyond just looks, cabinets play a major role in how your space functions day-to-day.
Storage, layout, and accessibility all come into play. Many homeowners explore how cabinetry impacts overall home design and usability.
Having everything ready before you start saves you from half-finished cabinets sitting in your bathroom for days.
You need:
- Trisodium phosphate (TSP) cleaner and sponges
- 220-grit sandpaper and a sanding block
- Shellac-based primer (for thermofoil/melamine) or bonding latex primer (for wood and MDF)
- Cabinet-specific paint in a semi-gloss or satin finish
- A 2.5-inch angled brush and a small foam roller
- Painter’s tape, drop cloth, and a screwdriver
- Wood filler or putty for any dings
Materials typically run $80 to $160 and it depends on cabinet size. Add another $30 to $80 if you are swapping out pulls, knobs, and hinges.
Either way, it is a fraction of what a new vanity installation costs in Las Vegas, which usually starts around $400 before labor.
6 Steps to Redo Bathroom Cabinets the Right Way
Good prep is 80% of the job. Follow these steps in order, and the paint will hold for years.
Step 1: Remove the Doors, Drawers, and Hardware
Take off the cabinet doors, drawer fronts, hinges, pulls, and knobs.
Label each door on the back with a small piece of painter’s tape so reassembly is easy.
If you are replacing the sink or faucet at the same time, disconnect those now too.
Step 2: Clean Every Surface with TSP
Bathroom cabinets collect body oils, hairspray, and cleaning product residue more than you think.
Trisodium phosphate cuts through all of it. Mix per the package instructions, wipe down every surface you plan to paint, then rinse with clean water.
If there are sticky spots from old cabinet bumpers, break them down with mineral spirits first, then follow up with the TSP wash.
Skipping this step is the number one reason DIY paint jobs peel within a year. Paint needs a truly clean surface to bond to, not one that just looks clean.
Step 3: Sand to Dull the Finish
Use 220-grit sandpaper to scuff the surface. You are not stripping it, just dulling the gloss so primer can grip.
Pay extra attention to inside corners and frame edges where finish tends to be thickest.
Wipe down with a damp rag and let it dry fully before moving on.
Step 4: Prime the Right Way for Your Surface
This is where most DIYers make the wrong call. For wood or MDF, use a latex bonding primer.
For thermofoil or melamine, use a shellac-based primer like Zinsser BIN, it is the only primer that bonds reliably to slick surfaces without peeling later.
Apply two thin coats, not one heavy one. After the first coat, fill any dents or dings with wood filler, sand smooth, then apply the second coat.
Let each coat dry overnight in a bathroom where air circulation is limited.
Step 5: Paint in Thin, Even Coats
Use a foam roller on flat door panels for a smooth, brush-stroke-free finish. Use your angled brush for frames and recessed details.
Two to three thin coats beat one thick coat every time, thick coats sag and take much longer to cure in a bathroom environment.
Pull the painter’s tape off while the final coat is still slightly tacky, not fully dry, for a clean edge.
Let everything cure at least 24 hours before reattaching hardware.
Step 6: Reassemble and Adjust
Once fully cured, drill any new hardware holes, then reattach hinges and door fronts.
Most European-style hinges have adjustment screws. Use them to get facing doors even and closing cleanly.
Reattach drawer fronts and test the slides before calling it done.
Quick Upgrades That Make Your Bathroom Look More Expensive
Paint does the heavy lifting, but a few small additions push the result further without adding much cost.
Most of these take under an hour and cost less than $100.
- Soft-close hinges: $4 to $6 each. A simple swap that makes the whole cabinet feel more premium.
- Rectangular mirror: Replacing a dated oval mirror can shift the room’s proportions more than you might expect.
- Peel-and-stick countertop paper: A marble finish is inexpensive and more convincing than most people expect, especially in photos.
Do not overlook lighting. Swapping a builder-grade bar light for a simple two-bulb sconce above the mirror takes about an hour and costs $60-$120 at any home improvement store.
It is one of the first things appraisers and buyers notice in Las Vegas homes, and one of the cheapest ways to make a bathroom feel intentionally designed.
When DIY is not Enough, Call Majestic Cabinets!
Not every bathroom vanity or kitchen cabinet is a good candidate for refinishing. And not every homeowner wants to spend hours sanding, painting, and troubleshooting unexpected issues.
If your cabinets show signs of structural damage, water exposure, warping, or outdated construction, refinishing will only go so far.
The same applies if your current layout no longer supports your daily routine or storage needs.
Majestic Cabinets proudly serves homeowners across Las Vegas, Henderson, Summerlin, and North Las Vegas, offering custom cabinet installation and design solutions.
Our team evaluates your existing cabinets and helps you decide whether cabinet refinishing, refacing, or full replacement is the right move.
Book your free in-home estimate today and get a professional recommendation for your space.